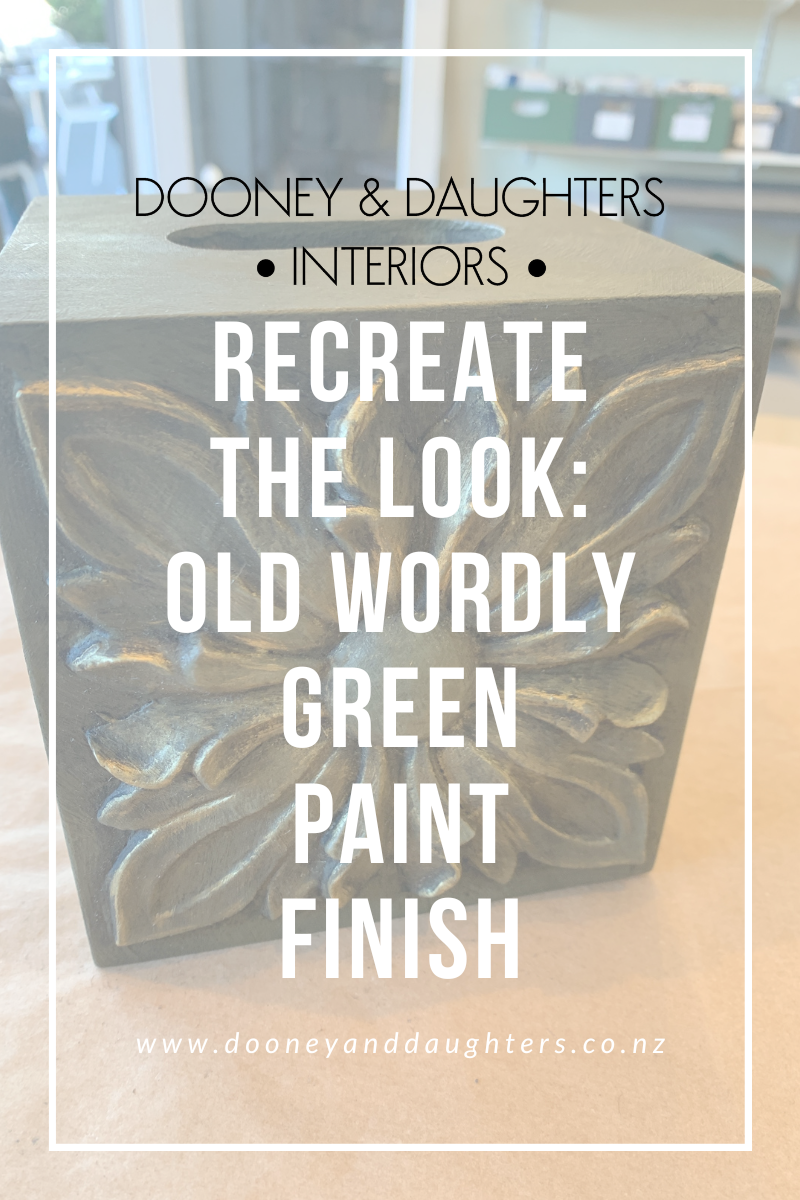
Recreate The Look: Old Worldy Green Paint Finish Over Efex
In this blog post we'll teach you how to apply Efex Mouldings and then create a beautiful, rich old world green paint finish using Olea chalk paint and a Carbon Black coloured wax, finished off with Indie Gold Metallic paint. We have done this technique on a tissue box, but you can do this on any project, including furniture.

Tools that you need:
- Olea Chalk Paint
- Carbon Black Chalk Paint
- Clear Wax
- Illuminator
- Indie Gold Metallic Concentrate
- Efex Moulding of your choice (for this project we used R111)
- Natural Bristle Brush
- Pro-Hybrid Round Synthetic Brush
- Artist Brush
- Lint Free Rags
- Super Fine Steel Wool
- Contact Adhesive
- Mini Measuring Spoons
- Baking Paper
- Pencil

Read on for step-by-step instructions:
1 - Choose your Efex Mouldings & decide where to place them on your project.
2 - Using a pencil or chalk, draw an outline of the moulding where you are placing it. Put your contact adhesive around the outline and inside of your pencil line. Then apply the contact adhesive all over the back of the moulding.
3 - Wait up to 10 minutes for the contact adhesive to be tacky but not wet - when touching it will feel tacky but the glue won't come away on your finger. This will ensure your moulding will stick properly.
Place your moulding onto your project and press down all over to make sure it has fully adhered.

4 - Paint in Olea chalk paint using your round synthetic brush for full coverage. Paint in crosses to create subtle texture. Do a second coat if needed for full coverage and lightly sand any excess texture off.

5 - Make a coloured wax using Carbon Black chalk paint and Clear Wax.
Use a 1:1 ratio (chalk paint to clear wax). Decant your Clear Wax onto a sheet of baking paper or other flat surface, add your Carbon Black chalk paint and mix together.
You can use more clear wax and less chalk paint if you’re wanting a lighter Carbon Black wax.
6 - Using your natural bristle brush, brush out all over the paint finish in a thin layer, gently wipe excess off with a clean rag. Allow some of the wax to build up in your moulding or other detailing.
7 - Have a play with your coloured wax. You can reapply the wax to build it up and make it darker in areas, or use your steel wool to pull the wax back to create highlights and shadowing, the steel wool can also blend the finish together.

8 - Mix your Metallic concentrate.Stir your Illuminator well and decant into a glass beaker, petri dish or onto some baking paper.
9 - Shake your Metallic Concentrate to redistribute all of the pigments.
Using your Mini Measuring Spoons, add your concentrate to your illuminator, keeping track of how much you use in case you need to make more! For this project we added one pinch to a small amount of Illuminator to get a thicker paint-like consistency. Use mixing sticks to mix both thoroughly together.
10 - Using your artist brush, pick up some of your Indie Gold paint, and then dab off most of the paint again (either on your baking paper or on a lint-free rag) until there is hardly any paint left on the brush.
11 - Dry-brush your Indie Gold onto areas you want to pull out detailing on, or highlight. Again, have a good play with it - you can build it up in some areas while leaving it lighter in other areas.

12 - Let it dry overnight and your tissue box is now ready to be used! A great way to make something functional and beautiful!