Upcycle Your Furniture – Prepping Furniture
After a beautiful and busy summer now is the perfect time to start working on all your furniture painting projects. In the first part of the series we talked about how to choose furniture to upcycle. In part two of the series we will go through how to prep your furniture so that you get the best paint finish possible.
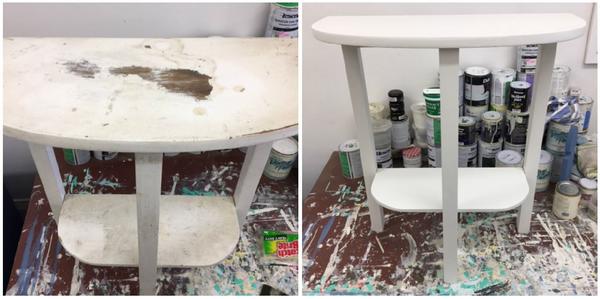
1 – Clean your item
We always recommend starting with a quick clean of your piece of furniture. Often second-hand pieces can be quite dirty or dusty. A quick clean will show up any stains, sticky patches, broken handles etc. If you have sticky patches (people love to put stickers on furniture!) make sure to give it a good clean to remove any residue. Sugar soap works well or you can get an adhesive remover from your local stationery shop.

The above side table was incredibly sticky and required a very good clean before it could be sanded and then painted.
2 – Remove hardware
If you don’t want to paint over your hardware make sure to remove it before you start. This includes handles and hinges. We often paint our hinges if we’re doing a distressed look and we paint our handles too if they’re in good condition but aren’t the right colour.
3 – Fill any gaps
Using a contract filler, available from paint and hardware shops, fill in any holes, gaps or dents. If you’re planning on changing the handles, make sure to fill in the old holes as they are often the wrong size or in the wrong place. If you’re wanting a distressed look don’t be too over-zealous with filling in dents, they give a lot of character that can’t be easily replicated! Follow the instructions for the contract filler and make sure it is fully dry and that you have sanded it smooth and level before painting.
4 – Sand
We recommend using furniture specific paint like our range of Premium Chalk Paints as they’re designed to make painting easy and fun. While chalk paint doesn't require sanding, make sure to sand off any loose or flaking paint or lacquer.

While the wood stool only required a light sand, the stool on the right had been partially spraypainted and needed a thorough sand to even it out.
5 – Clean your item
Now it’s time to give your item a good clean. You want to make sure that there’s no dust or grit when you start painting. If there’s a lot of dust from when you sanded, try vacuuming first to remove as much as possible. Make sure to wait until your item is completely dry before you start painting.
We hope that these tips help you to prepare your furniture for all your painting projects! We always recommend prepping properly so that you can achieve your best paint finish.
Next up in our series it will be time to paint your item!
Nicolette