Using Fiber Paper for Decoupage
Discover a fresh way to transform your furniture and decor with our Redesign Decoupage Fiber Papers. Stronger than traditional rice paper, these fibers are easier to work with and deliver a beautifully smooth, professional finish.
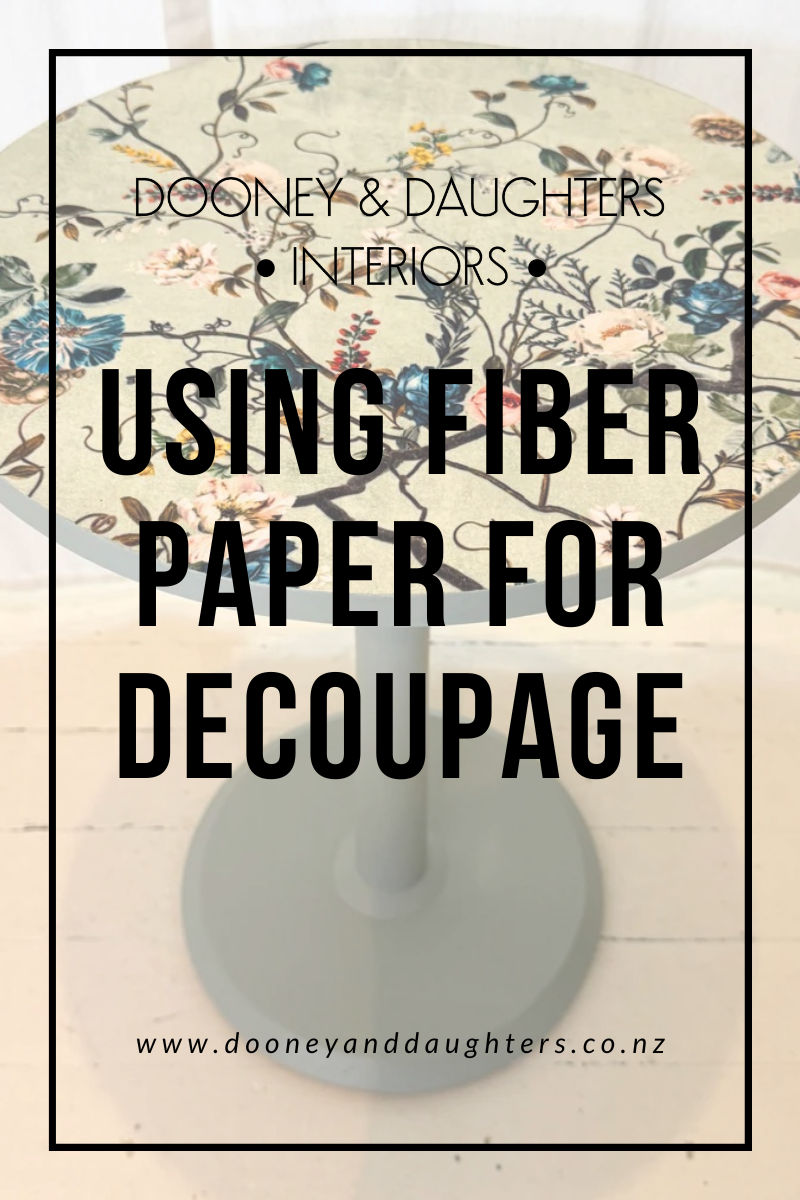
In this post we’ll walk you, step-by-step, through applying and sealing your fiber paper so your finished piece looks flawless and lasts. For this project we created a gorgeous side table, but these papers are perfect for all sorts of furniture projects, like drawers, bedsides, tables and more.

Tools Needed:
- ReDesign with Prima Fiber paper of your choice
- White Chalk Paint - we used Beluga
- Premium Lacquer - we used Matte but any sheen works
- Staalmeester Pro-Hybrid Round Brush
- Staalmeester 1-Inch Flat Brush
- Mint Felt Applicator
- 240 Grit Sandpaper
- Olive Soap

Step One: Prepare your base
Paint the area where your fiber paper will go using a white (or light coloured) chalk paint and your round brush. Paint for full coverage (usually two coats but can be three) for solid even coverage.
This light base will allow the colours in your fiber paper to really pop and give your finished piece a vibrant finish.

Step Two: Position & Adhere your paper
Decide exactly where you want to place your fiber paper before starting. Using your flat brush, apply a strip of lacquer along the top edge of the area.
Gently position the top of your fiber paper onto the wet lacquer. Then, using your Mint felt applicator smooth the paper down, working upwards and outwards to press out any air bubbles and ensure your paper is glued down.

Step Three: Work in sections
Continue working in manageable sections to keep the paper smooth and free of air bubbles.
1. Brush on another strip of lacquer.
2. Lay the next section of fiber paper down.
3. Use your Mint applicator to press the paper down, this time working downward to push any air bubbles toward the bottom edge that hasn't been glued yet.
Repeat this process until the entire fiber paper is adhered.
Tip: For this table we started at the top and worked our way down, but do whichever way works for your piece.

Step Four: Sand & Seal
Once your fiber paper is fully decoupaged and dry, gently sand off any excess paper to create a smooth, clean edge. Always sand in one direction, away from the paper, so as not to lift up any edges.
Finish by applying one or two topcoats of lacquer using your flat brush for a durable long-lasting finish. We used Matte lacquer for these tables, but Satin or Gloss works beautifully if you prefer a higher sheen.

Step 5: Finish your piece
Now you're ready to paint the rest of the piece in your chosen colour. Seal with either wax or lacquer depending on the look and level of durability you want.
For our table, we paired the Blossom Perch paper with Duck Egg premium chalk paint and sealed with Matte Lacquer.
A quick tip: wash your brush with olive soap after using lacquer to keep your bristles soft and in great condition.Nicolette Borich